When making molds with RTV-2 silicone, an incomplete cure that results in a sticky or gummy state is a common frustration for beginners. Although the mold's surface may seem set, the interface in contact with the master model remains an uncured gel. This article will provide a detailed analysis of the root causes of incomplete silicone curing and offer effective solutions to help you resolve this common issue.
1. Overview of Sticky Silicone
A "sticky" silicone cure is essentially a direct manifestation of an incomplete cure. It refers to a situation where the silicone remains partially or entirely in a liquid or gel state, even after the manufacturer's recommended cure time has been met or exceeded.
Typical Case: Many makers encounter incomplete curing issues with platinum cure silicone when using photocure (SLA/DLP) 3D prints as master models. The part of the silicone in contact with the print fails to cure, leaving a gooey, irreparable mess. The root cause is not the cured resin itself, but rather the unreacted chemical residues within the print.
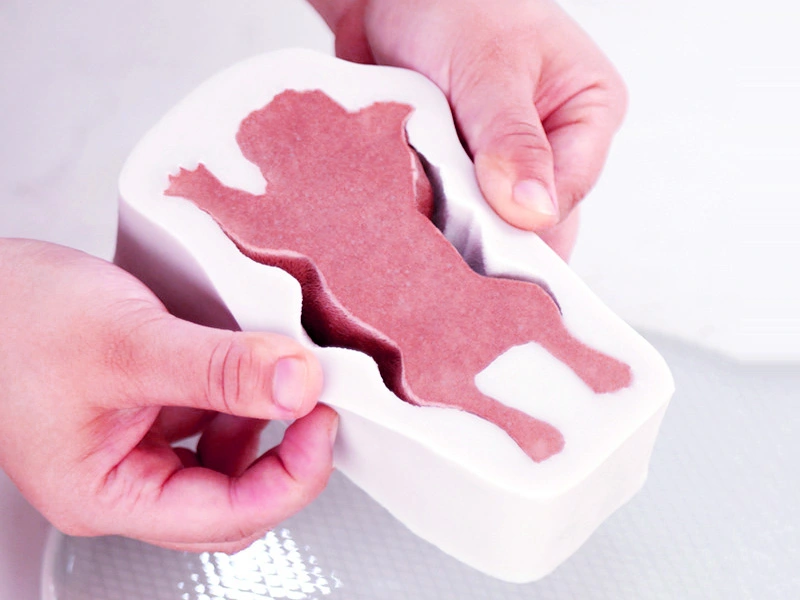
 Sticky silicone mold due to cure failure
Causes of Cure Failure:
Chemical Migration: Photoinitiators (like TPO) and unreacted monomers from the photopolymer resin can migrate to the surface, interfering with the curing process. This is why a print that appears fully cured and clean can still cause cure inhibition days later.
Catalyst Poisoning: These leached chemicals will permanently deactivate or "poison" the catalyst, thereby blocking the curing reaction.
2. Primary Causes
The reasons for silicone cure failure can be attributed to three core factors: improper handling, environmental factors, and chemical inhibition.
a. Improper Handling
1. Incorrect Mix Ratio: The curing of RTV-2 silicone is a precise chemical reaction between Part A and Part B. You must strictly mix them by the weight ratio specified by the manufacturer. Any visual estimation, mixing by volume, or arbitrary reduction of the curing agent (Part B) to extend the pot life will result in an incomplete reaction, leaving the entire silicone body soft and sticky.
2. Insufficient Mixing: When stirring high-viscosity silicone, it is very easy to create "unmixed spots" along the sides and bottom of the container. These poorly mixed areas will result in localized uncured, sticky patches.
3. Component Mismatch: The Part A and Part B of each model are a precisely paired chemical system. Using components from different models, brands, or batches can lead to cure failure.
4. Tool Contamination: If the master model's surface has dust, oil, or moisture, or if there is residue on the mixing tools, it can physically or chemically interfere with the cure.
b. Environmental Factors
Temperature: RTV stands for "Room-Temperature-Vulcanizing," but this "room temperature" refers to an optimal range, typically 20-25°C (68-77°F). At temperatures below 15°C/60°F, the curing speed will slow down significantly; below 10°C/50°F, the reaction may even stop completely.
Humidity: Condensation cure (tin-catalyzed) silicones rely on atmospheric moisture to cure and may fail to cure in extremely dry environments. Addition cure (platinum-catalyzed) silicones do not rely on moisture, but extreme humidity can cause a film of water to form on the master model, affecting the cure.
c. Cure Inhibition
Cure inhibition is a common cause of cure failure in platinum cure silicones. It occurs when certain chemicals "poison" the platinum catalyst, preventing the curing reaction. A typical sign of inhibition is when the layer of silicone in contact with the master model fails to cure, while the portion exposed to the air cures properly.
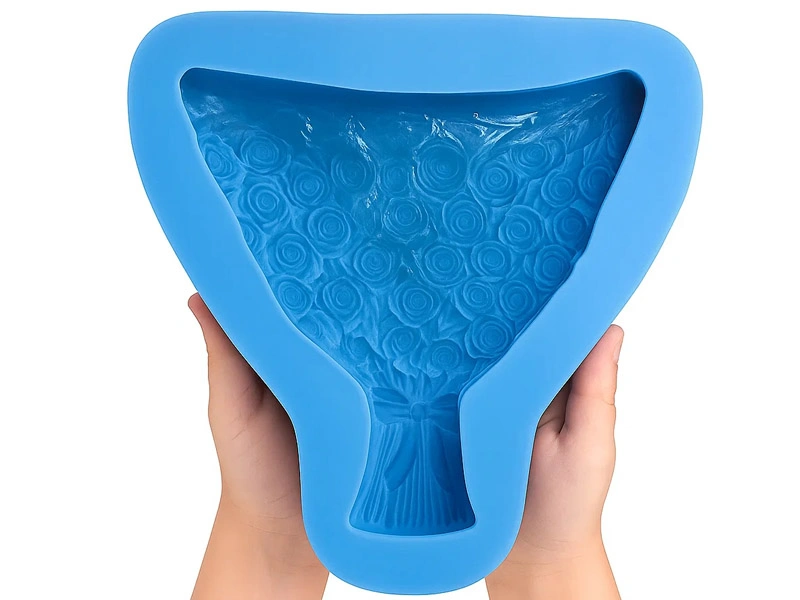
 platinum cure silicone
Common inhibitors for platinum catalysts include:
- Sulfur (S) Compounds: The most common source. Includes: sulfur-based modeling clays, latex gloves, natural rubber, neoprene, some industrial oils and solvents.
- Tin (Sn) Compounds: Includes: tin-cured silicones and their catalysts, certain stabilizers in PVC plastics, organotin compounds, and solder paste residues.
- Nitrogen (N) Compounds: Primarily amines, amides, and polyurethanes (PU) cured with amine catalysts, certain neutralizing amines, nitriles, and cyanoacrylates (super glue).
- Phosphorus (P) Compounds: Such as phosphates, phosphites, and certain photoinitiators in UV resins (e.g., phosphine oxide, TPO).
- Specific Materials: Certain woods (especially pine and basswood), Bondo/polyester resins, some paints and varnishes, tapes (like duct tape), acetone, and MEK.
Interestingly, sometimes seemingly unrelated items can be sources of inhibition. For example, the chemical composition of the adhesive on some brands of clear tape or labels can also cause cure failure in platinum cure silicones.
3. Diagnostic Steps
If you encounter a silicone cure failure, follow these diagnostic steps:
Step 1: Be Patient
Many RTV silicones become tack-free within a few hours, but the internal cross-linking reaction may take much longer (24 hours or more). If the silicone is still sticky after 48 hours, you can confirm a cure failure.
Step 2: Try Applying Heat
If the silicone shows signs of curing but is progressing slowly, try raising the ambient temperature to around 30°C. If the cure improves significantly within a few hours, the problem was likely low temperature. If there is no change, the issue points to improper mixing or chemical inhibition.
Step 3: Analyze the Pattern
Observe the specific pattern of failure to quickly pinpoint the cause using the table below.
| Symptom of Cure Failure | Likely Cause |
|---|---|
| Entire mold is sticky or gel-like | Incorrect mix ratio or insufficient mixing |
| Top has cured, but the surface in contact with the master is sticky | Chemical cure inhibition |
| Curing process is extremely slow | Ambient temperature is too low |
4. Solutions
Once a cure failure is confirmed, especially due to chemical inhibition, the sticky layer is irreversible. The goal is to completely remove the contaminants and restore the master model for the next attempt.
Phase 1: Thorough Cleaning
1. Physical Removal: Use a scraper or a lint-free cloth to remove as much of the gooey silicone as possible.
2. Chemical Cleaning: Use a solvent to dissolve the residue. Always work in a well-ventilated area, wear protective gear, and test the solvent on an inconspicuous part of your master for compatibility.
- Mild (Preferred): High-purity isopropyl alcohol (IPA >90%), mineral spirits.
- Moderate: Acetone. Effective, but may damage some plastics and paints.
- Strong (Use with caution): Toluene, xylene. Highly toxic and flammable; should only be considered as a last resort with professional-grade protection if other methods fail.
3. Final Wash: After solvent cleaning, you must wash the master model again with soap and water to remove all residues.
Phase 2: Enhanced Post-Curing (for 3D prints)
1. Underwater Curing: Submerge the 3D print in clear water for UV curing. The science: water not only blocks oxygen (which can inhibit surface polymerization, causing tackiness) but more importantly, it acts as a solvent, helping to leach out and dissolve water-soluble photoinitiators and their by-products during UV exposure. A recommended underwater cure time is 30 to 60 minutes, or even longer.
2. Extended UV Curing: Place the print in a UV curing chamber for at least 6 hours, ensuring the UV light reaches all surfaces, especially crevices and undercuts. Using clear or translucent resin can significantly improve UV light penetration and curing efficiency.
3. Oven Baking: After UV treatment, bake the print in an oven at a low temperature of 45°C to 60°C for 4+ hours to promote full reaction and vaporize any remaining volatile substances. Note: Most standard resins will begin to soften and deform above 60°C, so temperature must be strictly controlled.
Phase 3: Physical Barrier (Sealing)
If you are still concerned about inhibition risk after post-curing, spray a known non-inhibiting coating onto the master model's surface to create a physical barrier. Common sealers include PVA (polyvinyl alcohol) release agent or an acrylic clear coat spray like Krylon Crystal Clear. Note that this method may sacrifice some of the finest surface details.
Phase 4: Indirect Molding Method
When the master model is extremely valuable or if all other methods have failed, consider an indirect molding approach:
1. Create an Intermediate Mold: Use a tin cure silicone (which is not sensitive to inhibition) to make a mold of the original master.
2. Cast a Replica: Use the tin cure silicone mold to cast a copy in a chemically stable material (like epoxy or polyurethane resin).
3. Make the Final Mold: Use this chemically "clean" resin replica to make your final platinum cure silicone mold.
5. Preventive Measures
To avoid cure failure, follow these golden rules based on scientific principles and extensive practical experience:
Rule 1: Know Your Material
Before you start, be clear about whether you are using a tin cure or platinum cure silicone. If it's the latter, you must be highly vigilant about the list of inhibitors.
Rule 2: Always Do a Small-Scale Test
Before committing a large batch of material, always, always, always do a small patch test. Mix a small amount of silicone and apply it to a corner of your master or a piece of scrap material of the same kind.
Rule 3: Prepare Meticulously
Surface: Ensure the master model is clean, dry, and free of contaminants.
Tools: Use completely separate and clearly labeled tools for platinum cure and tin cure silicones.
Personal Protection: Using vinyl gloves is the lowest-risk option. Absolutely avoid sulfur-containing latex gloves.
Rule 4: Follow Proper Procedure
Measure by Weight: Always mix components by weight, not volume. Use a digital scale with a precision of at least 0.1 grams.
Mix Thoroughly: Use the "two-container mixing method." After mixing thoroughly in one container, transfer the entire batch to a second, clean container and mix again with a new stick. This is the best practice for systematically eliminating unmixed spots.
6. Conclusion
The stickiness caused by an incomplete silicone cure is not a mystery but a direct result of improper handling, environmental factors, or chemical inhibition. By following proper procedures and taking rigorous preventive measures, you can effectively avoid this issue and create perfect silicone molds.